Feast of Crows

I can’t quite believe that it’s been over two months since I last posted on here. I could go into great detail as to why, but generally anyone visiting this site isn’t here to hear me moaning about how real life crap has got in the way of doing hobby-related stuff, so I won’t bore you. Suffice to say, some people are quite passionate about cardboard boxes and want them delivered with the sort of alacrity that you would usually attribute to urgent medical supplies, such as blood plasma or donor organs…

However, I haven’t been entirely idle in hobby-related pursuits, even if what I HAD planned to do was pushed to one side in favour of something else.

Those who follow this blog will know that, whilst a fan of Star Wars, I wasn’t keen on spending vast sums of cash getting into Star Wars Legion. Yes, I’ll admit the models are lovely, but I balk at spending £30 on seven miniatures, no matter how pretty they are.

Hence my Distant Stars project, where I find suitable proxies for the various factions within my version of the Star Wars universe. I’d been using the Void 1.1 plastic marines and junkers for my Stormtrooper and Scout Trooper proxies, but when I went to the Scotia Grendel website, I discovered that they had sold the entire line to Seb Games. After a quick search on their website, I couldn’t see the plastic sprues anywhere, so dropped them an email to query whether they wold be stocking them and got a ‘yes’, so all was right with the world.

However, if the particular style of the Viridian Space Marines doesn’t meet your proxy Stormtrooper needs, then why not get some Wargames Atlantic Eisenkern Stromtroopers instead?

£25.00 for 20 multipart hard plastic figures seems like a better option than forking out £30 for 7 genuine licenced SW Stormtroopers and that’s not because I’m “tight”, as my wife says when I refuse to spend £4 for a Starbucks when I can get a perfectly serviceable coffee from McDonalds for half that, but because if you have limited funds, you want to get the most for your money.

So, whilst I may be gathering my troops to either save or subjugate the galaxy, it occurred to me that I didn’t actually have any rules with which to fight these battles. I looked at the various free rules from Mantic Games, etc. and realised that I could potentially use them, but as I had a half-written set of mass combat rules languishing on my disc drive, I decided to brush them off and revise them instead.

So, that’s what I’ve been working on – Feast of Crows – a set of generic mass combat wargaming rules that should allow you to fight whatever battles you want, with whatever figures you have available, be they a snarling horde of feral goblins, a highly trained phalanx of Greek hoplites or Grimdark space marines allegedly saving the Universe from the incursions of Chaos – or any mish-mash of the above.

Once they are done, I will post them on here for all and sundry to give them a try. I’ve kept the rules relatively simple, so they should be easy enough to pick up and play without the head-scratching you get when reading through some rule sets out there.

And remember – The only real victor in any battle are the crows…

The Perfect Storm?

So, here we are, 11 days into July and even with the week’s extension that I kindly gave myself (because I’m nice like that), I still managed to fail to complete my Forgotten Heroes entry until last night. So, four days over. A pretty poor showing on my part.

Note to self: Must try harder next year.

Anyway, this is the figure I started with, a DC Heroclix Signalman, complete with weedy arms, which I removed and replaced:

And this is what the end result should look like, the Tornado, in all his pink and red glory;

So, having done the majority of the shading last time, the first thing I needed to do was reattach his painted cape with hot glue, which I was somewhat nervous about, as I wasn’t sure if the hot glue would react with the paint and result in me having to repaint various parts of the figure. I needn’t have worried, as this went extremely well and set in no time, allowing me to complete the details.

I started by painting a capital ‘T’ on his chest in Docrafts Noir (black to those of us who don’t speak French), then when this was dry, painted a smaller ‘T’ in Docrafts Blanc (i.e. white) inside the black, so as to create a black border. This needed several touches up to neaten the borders, but all was good at the end.

Next, the black was used to paint a tiny ‘T’ on his belt buckle, as everyone needs to know that it’s HIS belt. I also used some watered down black to add shading to the cavity in the top of his holster, to suggest shadowing.

I then moved on to his eyes. Now, I’m always nervous about painting eyes, as if you cock it up, you end up with a cross-eyed hero, which no-one will take seriously. Two blobs of white were adding to suggest his eye-sockets in his mask, then I carefully painted one eye, then the other, making sure that they were even. Then I tidied up the edges of his ‘mask-holes’ with some Cherry Red. A few parts of his cape, where the wash from the previous stage hadn’t taken, were over-painted with GW Tentacle Pink (at least I think that’s what it’s called) and a black circle added to the end of his gun barrel, to suggest a hole.

Finally, I mixed some black with burnt ochre to get a dirty wash, then liberally applied this to the base, which had previously been given a cost of dark grey. This was to suggest dirty concrete.

And he was done.

Even with the pink cape, he doesn’t look like someone you want to mess with.

So, done for another year and another unique figure for my collection. I’m pretty pleased with how he came out, even if he did take slightly longer than anticipated to finish.

So, what’s next?

Well, it occurred to me that I’ve not recently turned random crap into something cool and I’d squirrelled away the below;

A couple of months ago, I replaced the windscreen wipers on my wife’s car. As I’d bought Halfords own brand, they have a generic blade for the model of her car, but it comes with multiple fittings so it can be used on different makes. I used the correct fittings, but ended up with two of the above extra fittings. Not being one to throw away interestingly shaped bits of plastic, especially when they can be re-used elsewhere (single use plastic? I think not!), I kept hold of these, as I had a cunning plan…

So, what am I going to use them for, you may ask?

I’m not saying yet, but the image below may give you a clue;

Join me next time, when we will be voyaging to a galaxy far, far away, for some high-speed pursuit amongst over-sized trees, avoiding feral teddy-bears…

The Tornado’s Greatest Enemy

Here we are, 3 days before the end of June – the official end to the Forgotten Heroes challenge – and what progress have I made on my entry, the Tornado?

None.

At the beginning of the month, I was aware that I had holiday booked for the third week of June, but did think that it wouldn’t be an issue – I mean, three weeks is plenty of time to complete and paint a miniature, right?

Au contraire, mes amis. I had forgotten that, several days both before and after the scheduled flying dates, it is necessary (apparently) to prepare for the holiday and then deal with all the washing created by said holiday.

Realising that I was rapidly running out of time, I got my converted figure out and offered up the cape I had removed, to work out if I needed to trim the cape down before re-attaching it and to see if it was worth painting the figure up before I added the cape back on. During this process, I managed to knock off one his arms.

So, it turns out that the greatest enemy of the Tornado is… me.

After some choice expletives, I dug out my superglue, only to find that I hadn’t sealed it properly and the lid had sealed itself to the tube.

More swearing.

I finally managed to get the lid off, but the tube was, to use the vernacular, fucked. I did mange to get enough glue out to reattach the arm, but by this point I knew that if I continued, I’d just end up doing more damage, so carefully put the figure down and stepped away.

However, as it’s MY challenge, I am officially extending Forgotten Heroes for a further week… because I can. That should give me enough time to finish off this bloody figure.

I may not have been particularly productive this year (so far), but everyone else has put me to shame.

Dave at Wargamesculptor blog has created a fantastic diorama of D.R. & Quinch from 2000AD, as well as a plethora of obscure Star Wars characters.

Sabrina at Uthwulfminis has created Powdered Toast Man from the Ren & Stimpy Show.

James from spoontastic_minis has done a fantastic conversion of Forbush Man from Marvel Comics.

And Keith from Dead Dick’s Tavern & Temporary Lodging has created both Dreadstar and Whisper, both from First Comics.

So, go and take a look at what people who were a bit more organised that me have done and marvel at that creations.

As for my entry, I WILL get him done, but probably not before the end of June.

Because I’m a bit crap…

A Brief Diversion to a Galaxy Far, Far Away…

Waaaaaay back in May last year, I backed my first Kickstarter, details of which can be found in this post.

It was supposed to ship around September 2021, but various issues led to delays, but finally my pledge arrived last Monday! Yay!

However, I wasn’t in when the postie turned up, so had to wait until last night to collect my goodies. I pledged £30 ($40) for a squad of 28mm Astroguards cast in white metal, which would have been 8 Astroguards, so £3.75 a figure. However, due to the success of the campaign, I ended up with the bonus add-ons, so ended up with 22 figures, which works out as £1.36 a figure. Result!

Here is the Astroguard squad, with two female Astroguards swapped out for the duplicate sculpts from the original squad, along with two of the bonus figures, armed with heavy weapons – a light repeating laser on the left and a meson blaster on the left.

They kind of remind me of the cloud car pilots from The Empire Strikes Back, so I may very well paint them to resemble that uniform.

Next, more bonus figures. These are, left to right, top to bottom, “cantina celebration” aka party walrus-man, Gary, Beefhead Elder, Rod Roebuck, Space Cadet, Ensign Packman and Man Hunter.

Obviously, you can see these were inspired by Star Wars, Star Trek and Buck Rogers in the 25th Century, but all will join my Distant Stars project.

Finally, we have the droids…er…bots. A Power Bot at the top, with a selection of arms and four Scouter Bots, all with a different head. I may add the two spare arms to one of the Scouter Bots, if I feel inclined.

Nice clean sculpts, although some flash on a couple of the figures, but nothing major. Strangely, they were supplied with 20mm slotta bases, rather than 25mm, which is fine for the Bots, but look too small for the others, so these may have to get swapped out.

These were just the figures from the basic pledge, so there are more in the range. Should you be interested in getting some for yourself, this is what the Kickstarter page has to say;

“Missed the campaign? Don’t worry, there’s still an opportunity to pick up figures from the Star Schlock Astroguards Kickstarter. 

Visit starschlock.com for info!

That’s all for this brief diversion, as I still have a giant made from Shredded Wheat to paint up before the end of the month – then we’re in to Forgotten Heroes territory!

God knows what I’m going to do for that… I’m not quite as organised as I was last year. I have a vague idea, but we’ll have to see if if will work.

New Year, New (ish) Project

If you’ve been regularly checking in here to see if I’ve been actially doing anything, you will have been a little disappointed, as it has been quite a while since I’ve been anywhere near anything hobby-related.

However, with the imminent (hopefully) arrival of my Kickstarter goodies and a financial windfall in the shape of some Christmas money, I decided to splash out a little on some hobby stuff.

Way back in 2015, Michael Awdry of the 28mm Victorian Warfare blog posted about a game called Space Cadets. Now, whilst I quite liked the idea of the game and the way it utilised hexagonal tiles to represent the exploration of a derelict spacecraft, the price point was above my available funds and I was only really interested in the tiles.

This had been on the back burner for the last 6 years, and with the Distant Stars project, I decided that I would still like to do something of this ilk, but using my existing figures from that project.

As Kallistra produce a range of interlocking plastic hexagonal tiles, 100mm across the flats AND do packs of ten individual hex tiles in black, for a very reasonable £7.50, I ordered a set, to see if they could be used for this.

They arrived yesterday, so out came the camera and some figures, so I could see whether my nascent idea had any legs.

As you can see, you get ten hexagonal tiles, hollow on the underside and 20 clips, which allow you to clip the tiles together.

The edges of each tile have a recess, so that when the clips are attached, the tiles sit flush with the table and are a pretty tight fit, so they won’t become detached during play.

They can be attached along each flat edge, so if you have a tile attached to every edge, you’d need 6 clips, hence why you get 20 in the pack. I’d not realised this when I ordered, so had ordered a further pack of 50 clips, in case I needed anymore – which I didn’t.

Using all 10 tiles, I set them up as a random complex of corridors. The initial idea was to spray them with a metallic dark grey, and use thin card or plastic card between the tiles, held in place with the clips, to represent walls. However, the clips are designed to hold the tiles quite tightly together, so this won’t work.

However, as the tiles are designed to be be stacked when not in use, they do have a recessed edge, so when clipped together, there is a recessed channel around each tile edge, so I might be able to slot a suitable ‘wall’ into these.

Now, whilst I’ve given a measurement across the flats, this doesn’t really help with working out whether they’re any good for 28mm figures, so let’s dump some miniatures on them and see what it looks like…

A couple of Protectorate Outriders, accompanied by a Androne, explore an abandoned facility…

However, it would appear that the facility is not as abandoned as they believe.

“Danger! Danger! Hostile entites approaching…”

We shall leave the brave folk of the Protectorate to their potentially grisly fate.

So, I’m pretty happy with both the size and price for these and think they should work pretty well, but feel I may need at least another pack. As they’re only £7.50 a pack, this isn’t a great expense, but bear in mind that the minimum order quantity is £10.00 before postage, so you might want to have a look at some of the other stuff on the site before ordering.

They do single hex terrain features which sit on top of the standard hex tiles, including craters, hills, broken ground, etc. which are only advertised in the standard brown colouring, but I did query this with Kallistra and they would make them in the other two colours (black and blue). However, as this would be a special order, it would take longer to produce.

If you’re planning on spraying them anyway, that probably doesn’t matter, but it’s good to know that the option is available.

That’s all for now, but rest assured that the Crow is on the wing once more, so expect more regular posts.

Especially since I’ve now seen the new Ghostbusters movie (which is what the 2016 one should have been, but wasn’t) and I feel that the Rookhaven Ghostbusters franchise needs to have their uniforms completed and be sent out to bust some heads…in a spiritual sense.

“What a Piece of Junk!”

Due to my current shift pattern, I work one Saturday in every three, meaning I get a day off in the week in lieu. Usually, this ‘day off’ gets eaten up by a list (lovingly prepared by my wife) of jobs for me to do.

However, yesterday’s list was quite short, so was completed in good time leaving me with some free time…so, out came the paints.

First up, my APC;

Black gloss enamel was used on the skirt and windscreen, GW Chainmail on the front nozzles and turret gun and Docrafts Noir on the side panels and turret.

I noted that every picture I took of this vehicle didn’t really highlight the sloped nature of its shape, so took so lower down photos to show this.

Looks a bit like Maximillian from The Black Hole movie – which although it was a bit naff, did have some cool robots.

Speaking of cool robots, I next went to work on my drone cargo sled, but I won’t bore you with the exact colours I used, just show you some pictures;

Just a little bit more detailing and I think it’ll be done. I’m pretty happy with how it’s turned out.

Just goes to show that a little bit of creativity with stuff you’d normally throw out can produce a pretty cool model.

This Is The Way…To Save Money

Regular visitors to this humble blog will know that whilst I enjoy my gaming, I tend to balk at some of the prices charged by certain companies for the “necessary” components for <insert game of the month here>.

So, when inspired to try a new genre or game, I will tend to look for inexpensive options, rather than go for the official figure lines.

Such is the case with my Distant Stars project, which is my alternate reality Star Wars-inspired project, the last piece of kit I built for this being my scratch-built drone operated cargo sled, in this post.

Well, since last time, I have managed to slap some paint on it and it now looks like this:

The model was undercoated with Wilko Taupe spray paint on the top and Wilko Gunmetal spray underneath, which gave it a nice two-tone look. The drone ‘pilot’, terminal, thrusters and cargo bed were given a coat of GW Chainmal, with the cargo bed getting a wash of GW Brown Ink, to make it look oily.

The main body got a couple of coats of GW Orc Brown, which is a nice dark yellow, as you can see from the picture above.

Now that it’s got some paint on, it’s starting to look a bit more like an actual vehicle, rather than a conglomeration of bits.

Of course, whilst it’s nice to have some background vehicles, as the Dominion is a military force, it would be good if they had some war machines, right?

I knew roughly what sort of look I wanted and ideally would have gone for the latest iteration of the GW Land Raider – but wasn’t prepared to drop £60.00 on a single plastic kit. (NB: It was the Land Raider Crusader I craved…)

As with most things I do, I spend a fair bit of time trawling the Internet trying to find some thing suitable at a price I’m prepared to pay, before realising my time and money would be better spent just MAKING what I want myself.

So, after finally managing to secure an empty margarine tub (as I kept putting them next to the sink to wash up and my wife KEPT throwing them away), we were ready to begin.

I’s settled on this particular receptacle as a base for a tank/APC for two reasons; firstly, as far as I’m concerned, there’s no such thing as single use plastics and, secondly, when you turn it upside down, it looks like an armoured hovercraft:-

The next stage was to dress it up, with suitable “armoured panelling” and weapon mounts.

Two oblong panels of transparent plastic, scored and with portions cut out, were glued to the front and rear of my vehicle, to represent the cockpit and rear access door.

Two of the remains of the plastic ‘bulbs’ I used to make my Sontaran soldiers helmets were glued as forward-mounted weapons on the front, two GW cavalry bases were glued to either side to act as armoured panels and a turret was constructed from various plastic bits I had.

And to give a better sense of scale;

Unfortunately, as with my previous model, the use of transparent plastic means that some of the detail is not evident, so rather than leave it at that, I gave it an undercoat of Wilko Taupe spray, as this is the main vehicle colour of the Dominion.

And the rear;

A fairly substantial and imposing looking model, for very little outlay. And it actually looks like it could fit a squad of troops in, unlike some of the sci-fi vehicles out there.

Now, to fully justify my use of the above title, we have to mention The Mandalorian at least once.

Should you wish to add the title character of the above show to your tabletop games, a search of the internet gives you a few options, ranging in price from £10.00 to £15.00. However, all of these figures are 3D printed and whilst some are resin printed, the majority are not, meaning the quality of the figures are variable.

So, how about a METAL figure to represent Din Djarin for £6.00?

This is Brando from Diehard Miniatures. It comes with a resin base and alternate head, should you wish to have a bare-headed version.

And if you want to add some of Clan Wren to your games, but don’t want the full compliment from Legion’s £28 boxed set, then Diehard has you covered there to.

I mean, who wouldn’t like to get their hands on Katee Sackoff?

“This is the Way.”

If, like me, you are regularly clean-shaven then you will need some kind of device to remove your facial hair. And if, like me, you are somewhat wary of electric razors, you will wet shave with a manual razor.

Now, as the particular brand of razor I use has disposable heads, these come in a transparent plastic tray, which I squirrelled away for potential future use. And this is what the tray looks like;

Now, whilst I haven’t had much hobby time, I did manage to squeeze in episodes of the first season of The Mandalorian during the last couple of months…

Two things struck me from watching this – firstly, it is PROPER Star Wars, so if you’re a fan and you’ve got access to Disney+, watch it. Actually, if you like sci-fi Westerns, watch it. Even if you only sign up for the free period, it’s certainly worth a watch.

Secondly, there are a couple of episodes where vehicles with built-in droids – one a taxi, the other a cargo sled – which do look a little bit like my plastic tray above…

So, based on this (and the fact that during the period of non-lockdown, I finally relented and bought myself a cheap hot glue gun), I’ve decided to see if I can replicate this type of vehicle for my Distant Stars project. I’ve been collecting various bits for this, so it will (hopefully) be just a case of assembling the bits and then giving it a lick of paint. Let us begin!

So, having raided my bits box, I ended up with, for want of a better term, a pile of crap…

So, the tray itself, a couple of ink cartridges, some textured wallpaper, block of foam, cut down pen lid (that looks remarkably like a R2 unit), expired plastic gift card, empty shampoo bottle and some random plastic greeblies.

The cheapass hot glue gun I’d bought proved to be more of a hindrance than a help, so the DIY grab adhesive was duly…erm…grabbed and after much measuring, cutting, dry-fitting, trimming, filing, gluing and generally making a mess – we end up with something like this;

In the realms of Star Wars, this would be a droid-operated cargo skiff. In Distant Stars, this is a cargo drone. Same principal, different Universe.

Emptied ink cartridges as thrusters, textured wallpaper as the metal treadplate in the cargo area. Plastic greebly as operating screen, pen lid as drone ‘driver’ and the rest of the bits to make up the fuselage. A GW cavalry base was glued upside down to the base, to give the impression it’s floating.

And to give an idea of scale, here’s a Dominion Outrider cadging a ride.

Once the rain has stopped lashing down, I’ll be taking this outside to give it an spray paint undercoat. But what should the overall colour scheme be? Similar to Luke’s Landspeeder or, as it’s a cargo drone, more yellowish, like a taxicab? I wil have to give it some thought.

A Perfect Ten?

A recent poll of Doctor Who “fans” (and you’ll see why I’ve referred to them as such shortly) organised by the Radio Times was run to find the most popular incarnation of our favourite Time Lord. When the 50,000 votes were counted it was discovered that said “fans” had voted David Tennant as the most popular Doctor with 21% of the votes.

However, Jodie Whittaker came in a very close second, having only been beaten by Tennant by about 100 votes.  Which, based on who organised the poll (i.e. the Radio Times, traditionally a mouthpiece for the BBC) and that the REAL fans, such as myself, didn’t know about the poll until AFTER the results had been announced strongly suggests that these results should be taken with a bag of salt…

Anyway, this announcement and the fact that I’d not been motivated hobby-wise for a couple of weeks encouraged me to order some stuff online from eM4 Miniatures. Further incentive was that browsing their site showed that they have more ‘Sold Out’ items than ‘in stock’ items, so this might be my last chance to get my hands on certain figures.

First up, this chap;


This figure is 0057 Suit Shades SMG Hand Gun at £1.75, part of their Future Skirmish range, which were sculpted by Mark Copplestone for Grenadier way back in the murky past. In fact, this particular figure does have the stylised G on its tab, showing it came from the original molds.

My intention with this figure is to do something similar to how I created my version of the 8th Doctor, but this will be MY version of the 10th Doctor, based on his outfit from the Battle of Canary Wharf – including 3D glasses!

All I need to do is alter the pistol into his sonic screwdriver and redo the hair. The rest will just be painting.

After this is complete, that will just leave me two Doctors short – the Ninth and the War Doctors.

Next we have this;


This is one of the five multi-part (and by multi-part I mean three pieces) plastic Space Rangers sold by eM4 at £2.99. That works out at about 60p a figure – Bargain!

As I said above it comes in three pieces – main body, hands holding a weapon and the backpack. You get four of this pose, one squad leader/sergeant armed with a pistol and sword and a sprue of three heavy weapons. So you could have four rangers with the standard gun, or three with standard and one heavy weapon of your choice, or any combination of the above. Very similar to the Space Marines that came with the Space Crusade boxed game from GW – which they were probably based on.

Now, the idea with these was to add to ranks of the Dominion from my Distant Stars project, by making these the ‘heavy’ troops of the Dominion, with the Outriders being the light troops and the Legionnaires being the medium troops.

However, whilst the backpack doesn’t look too obtrusive from the front, it is a big hunk of plastic, as you can see below;


TOO big, in my opinion, so off it came, which gives us a more streamlined, but still imposing figure.


For comparison, here it is compared to the figures I’m using for my Outriders and Legionnaires.


As the ‘ribbing’ on the armour joints matches of the Legionnaire figure in the centre, I think that with an appropriate matching colour scheme, I can tie all three troops together as part of the same organisation, so the Outriders and Legionnaires will be joined by the newest Dominion troop type – the Siegebreaker.

Now there is one slight problem with not using the backpacks, which is this…


A big freakin’ hole in the back of the figure, which the backpack clips in to.
However, this is ME, so no doubt I’ll come up with a cunning plan to get around this.

I hope everyone is keeping safe and well in these uncertain times, but rest assured, I’M still here and will continue to do what I do, for both my and your entertainment.

Until next time…


Distant Stars – Air Support

Before I launch into the content of this post, to all those whose blogs I follow, please accept my apologies. I have been SO busy with one thing and another (which I won’t bore you with) that whilst I have read your recent posts, I haven’t really had a chance to comment on them.

Recently, the EuroMillions Lottery prize had reached a staggering £1.7 Million and they had stated that someone had to win it, so along with every other bugger in the UK, I bought a ticket.

And won! Yay!!!

But only £2.90. Boo….

However, as these were MY winnings (according to my wife), I was allowed to spend them on whatever I wanted…

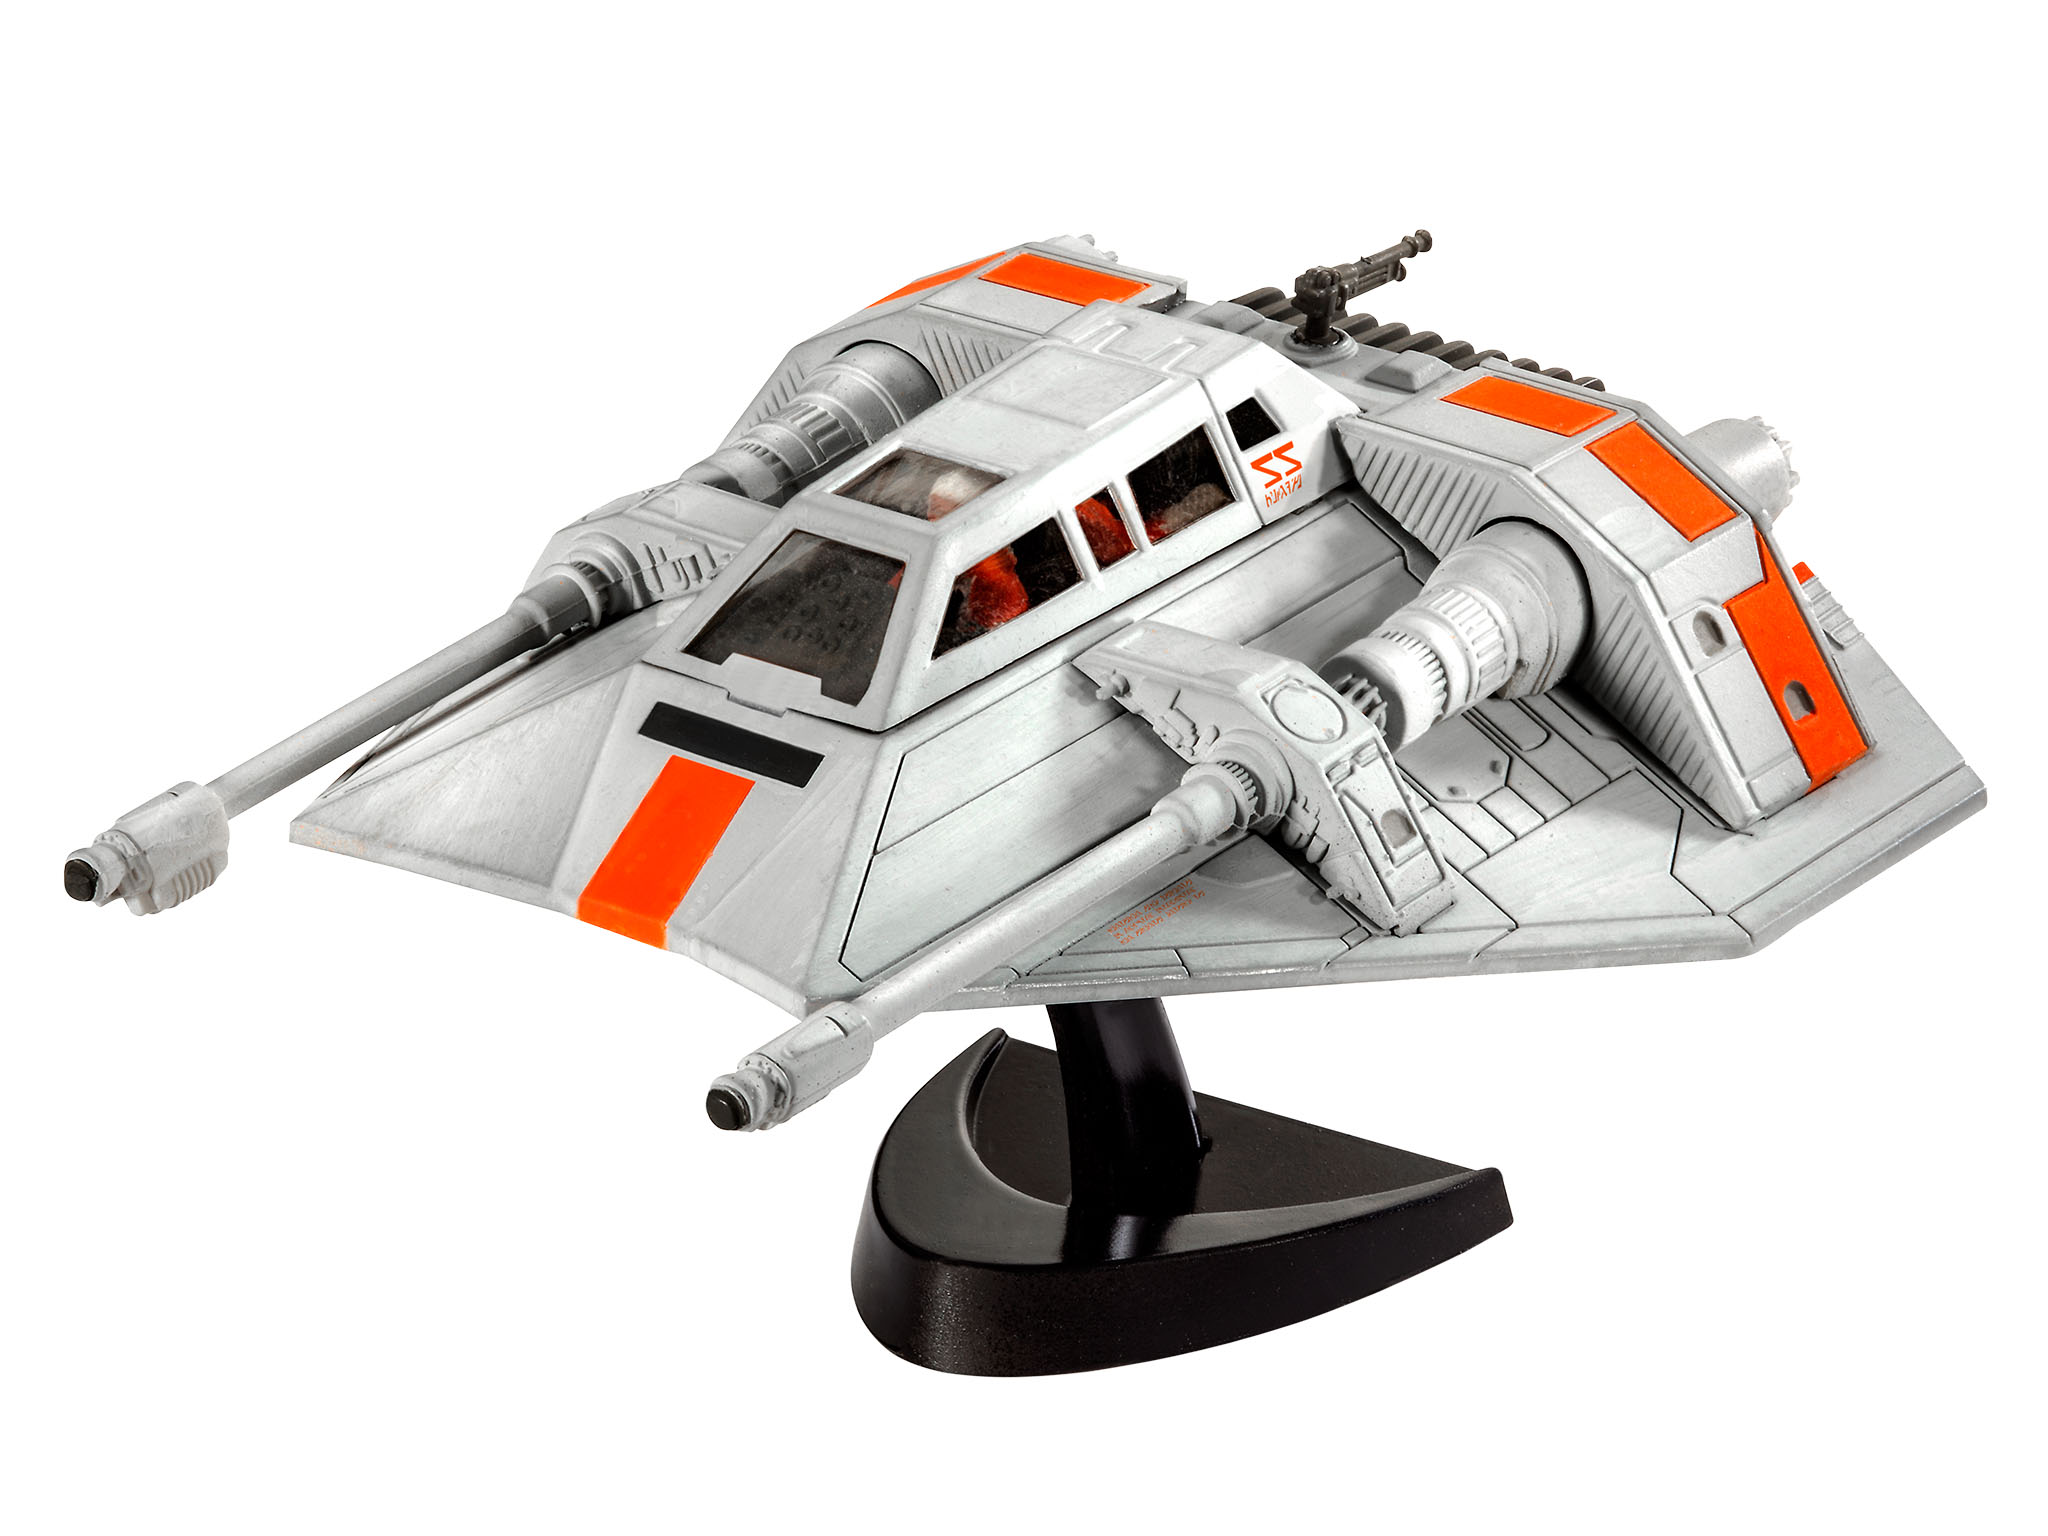
So I bought a Snowspeeder – specifically the Revell 1:52 ‘Easy-Click’ model (the one that comes in a bag), because it was only £5.00 in Hobbycraft.

Image result for revell snowspeeder

“Oooo, shiny!!!”

Now, I had broached this subject in a previous post, as I had read online that this model had been used as a proxy T-47 Airspeeder for Star Wars Legion, as it was roughly the same size AND Michael Awdry of 28mm Victorian Warfare had used one for a Star Wars inspired diorama and I wondered how it would scale in with my 28mm figures, as Legion’s figures are somewhat larger. I was assured that it should work fine and it kind of does – but took some Carrion Crow ingenuity to “make it so”, as you will see.

So, if you plan on getting one to use for YOUR Star Wars gaming, if you’re intending on using it as a crashed terrain piece or aerial support, you will have to paint over the cockpit glass, as the pilot and gunner figures clearly indicate that the speeder is too small.

To demonstrate this, the picture below shows a 28mm Future Skirmish figure from Moonraker Miniatures and next to it the Rebel pilot from the model kit – who I’ve just noticed seems to be grinning inanely…perhaps he’s soiled his flight suit like deformed Jelly Baby he is.

As my initial plan was to “just” replace the heads of the pilot with a suitable head from my multi-part “Dominion” figures, this clearly would not work.

However, after offering up one of my previously built Outrider figures to the model’s fuselage and the cockpit, I came up with a cunning plan…

The ‘speeder’ was obviously too small to be a two man craft, but could become a one-man “assault skimmer”, as the only thing that really scaled it was the pilots and the rear gun. As my Void Junker figures were multi-part, surely one could be adapted so he could fit within the cockpit? After some cutting, filing and gluing, I ended up with this first stage.

The control column is actually one of the backpacks from the Junker sprue, cut down to fit. As this looked like it was going to work, I continued with the build.

As you can see from the above picture, the craft looks more rounded than in the first picture. This is because as this model comes in a bag, rather than a box, the top part of the fuselage was a little warped, which was rectified when the underside was glued in place.

And almost done – including the flight stand.

On which it does balance very well.

However, the issue I had now was that the transparent canopy, which comes in one piece, wouldn’t fit  – as my Outrider was sitting too high. I could have just left it as it was, as it does look pretty cool already… but that’s NOT how I roll, is it? So, some scoring, snipping, cutting and filing later, the canopy was re-purposed as a rear and front screen, like so.

“Eat hot plasma, Union scum!”

These have not yet been glued in place, as the intention is to undercoat the whole model in black spray first, carefully paint the other transparent bits to match the overall paint job, then attach them. But before all that, I have to remove a few gluey fingerprints that I managed to get on the model – C.S.I. Hoth, anyone?

And as you may have gathered from the title, my alternate Star Wars project will now go by the name of Distant Stars – as in “a galaxy, far, far away.”

Join me next time – which will hopefully be before the end of the month – for more Distant Stars fun, after which I will be celebrating 50 years on this planet by saying things like “I remember when wargames was all cardboard chits, rather than your fancy 3D printed bollocks…”

Jez